

How To Create A Calendar For A Group
Sharing calendars in Office 365 with co-workers and external users is an everyday thing in business and corporate communications. Microsoft Office 365 provides a number of solutions for calendar sharing and creating Office 365 group calendar.
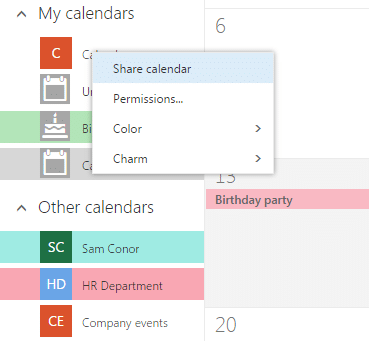
End users can easily share Office 365 calendar available for them in Outlook or SharePoint with the calendar UI options. Creating a new Office 365 group calendar to be shared across a company or with some other group members requires administrator permissions and is quite a complicated process.
Here we will have a look at how to create a shared calendar in Office 365 using Group calendar and shared Office 365 mailbox functionality.
Set Up Office 365 Calendar as a Group Calendar
- Open a SharePoint calendar and go to "List Settings" in the Calendar tab. Select "General Settings", and click "Title, description and navigation".
- For event calendar sharing in Office 365 with colleagues, enable the "Use this calendar to share member's schedules" option in "Group Calendar Options".
- In order to add conference room reservation to the group calendar, enable "Use this calendar for resource reservation".
When you create an event on your group calendar, all the group members will be notified of this unless you change the calendar permissions. That is a very useful feature of office 365 sharing calendar.
If you want to see other members' calendars, go to your group calendar and open the Calendar tab. Next, select a period you want to view events for by clicking the Day Group or Week Group option in the Scope group. Type in the name of the person or group in the Add Person option, or search for the person by clicking the browse icon. This is the way you can set a temporary view of other team member(s) within a group calendar.
Create Office 365 Public Mail Box in Enterprises Edition
In order to create a shared calendar in Office 365 that staff in your organization can access and edit, you must first create a security group, which contains users, whom you want to be provide access to the shared calendar. That's a very important step in creating calendar sharing office 365.
Creating a Security User Group
If you have already created a Security group, and would like to use an existing group of your organization that contains the people who will have permissions to access the shared calendar, you can skip this section.
- You can create the Security group by logging into the Exchange admin center (EAC).
- Use your Office 365 tenant administrator credentials to login.
Note: This option is available only to Office 365 Enterprises, Midsize, or Education edition. You can also access EAC by selecting Admin and then Exchange in the Microsoft Online Portal after logging in with your credentials. - Navigate to Recipients and then select Groups under Recipients.
- Click on the Add (+) button and the select Security group.
- On the New security group page, enter the necessary details for the security group, including the members and permissions for the new security group.
NOTE: If new users are created in your organization, who need access to this shared calendar or contact, you will need to add them to the security group.
Create a Public Folder Mailbox in Office 365
Note: Public folders are not accessible from Mobile Devices or Outlook Web Access (OWA).
- A Public Folder mailbox can be created from the Exchange Admin Center. Click on the Admin and from the drop down select Exchange.
- Then select the Public Folders section from the left side and then click on "public folder mailboxes" to create your public folder mailbox.
- Click on the Plus button and give a name to the new mailbox and then click on Save button.
Next step is to create a Root Public Folder.

Create a Shared Mail Box in Small Business Edition
- In order to share Office 365 calendar that people in your company can access and edit, you must create shared Office 365 mailbox in the first place. After you have created this mailbox, any users who are a part of this mailbox's member group will be able to access the calendar.
- First Step is to login to your Office 365 portal and then click on Admin in the top navigation.
- Select User & Group from the list.
- Once you are on the Users & Groups page, click on the link which says Shared Mailboxes, and then click Add (+) button.
- This will open up the shared mailbox page. On that page, enter the following information:
Mailbox name: the name with which this folder will appear in the address book, in the To field of email and also in the list of share mailboxes the user has access to. Make the name a user-friendly one so that people can remember it easily.
Email address: the email address for the shared mailbox. - Click Next. This will take you to the Add Members Page. Once you are on this page, click on the Add (+) button.
- Type the name of the person whom you want to search in the search field and then click Search. The person is added to the list of members. Continue this step till you have all the required members to the list. When you are done adding members, click Finish.
Note: If you have new Employees in your company, who need access to this mailbox, you must add them to the list of members who can access the mailbox. Then they will be able to share calendar in Office 365.
Once you have created the Shared mailbox, the next three steps are same for both the editions. You can follow these and create an Microsoft Office 365 shared calendar.
Creating Root Public Folder for Shared Calendar
You can create the root public folder for sharing calendars in Office 365 from the Exchange Admin Center.
- Click Public Folders located on the top of the screen. Then click the plus button and give a name to the public folder. Make sure the name is generic as this need to be used by all the users to whom the folder is shared with. Click on the Save button to save the folder.
- Once you have created the folder, you will have to assign the required permissions to the users of the folder.
- Right click on the folder name and click on Manage under Folder Permissions.
- Add the security group you have created and give the group Owner permissions (i.e full access).
Creating Shared Calendar Public Folder
- Once the public folder environment is configured correctly, we can start creating the Calendar folder using Microsoft Outlook.
- Open Outlook and then navigate to the folders list from the bottom task bar.
- Then navigate to the Public Folders section to see if the folder you created appears there.
NOTE: If the folders do not appear, check for the permissions or if you have created the folder recently it will take some time for it to appear. - Expand the Public Folders and navigate to the root public folder you created.
- Right click on this folder and click New Folder to create a folder for the Shared Calendar.
- Select the Folder Contains options as Calendar Items.
- To set permissions for this calendar, right click on the name and select Properties.
- Now add your security group under the permission sections and assign the required permissions.
What Permissions are Available and What do They Mean?
The following permissions are available for use when creating the shared calendar. By assigning the correct permissions, one can restrict unwanted user activities. It's very important point of using group calendar office 365.
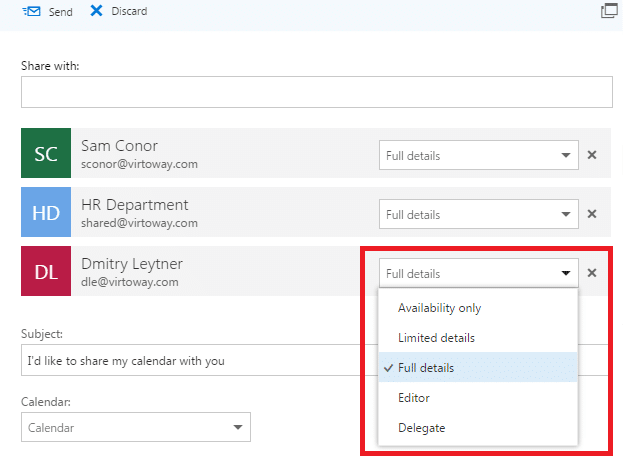
Anonymous: This refers to users outside your Organizations. The recommended permission options for this type of user is "NONE".
Default: This refers to users within your Organizations. These users are authenticated users and the recommended settings is "Author", which will enable them to create new entries to the calendar or edit the existing entries. Also they are able to share office 365 calendar.
There are various other permissions you can assign to users while sharing calendar in Office 365. The tables gives a short overview of permission can be given and what the users can do with those permissions.
| Permission: | Actions You Can Do: |
| Owner | Create, read, update, edit and delete all files. Can create subfolders. Also with this permission, you can change the permission levels that other users have for the folder. |
| Publishing Editor | Create, read, modify, and delete all items and files, and create subfolders. (Does not apply to delegates). |
| Editor | Create, read, modify, and delete all items and files. |
| Publishing Author | Create and read items and files, create subfolders, and modify and delete items and files you create. (Does not apply to delegates). |
| Author | Create and read items and files, and modify and delete items and files you create. |
| Contributor | Create items and files only. The contents of the folder do not appear. (Does not apply to delegates). |
| Reviewer | Read items and files only. |
| Custom | Perform activities defined by the folder owner. (Does not apply to delegates). |
| None | You have no permission. You can't open the folder. |
✓ USEFUL LINKS ON OFFICE 365 SHARED CALENDAR
- Calendar App for Office 365
- How to Share Tasks from MS Planner with Virto Calendar and MS Teams
- Export of ICS files to the Outlook
- Public Folder Calendar
About the author 

Tatiana Sushchenko is the product owner at VirtoSoftware. She started her IT career with the famous ABBYY Lingvo back in 2006 in Moscow. Then she moved to Microsoft performing strongly in various marketing management roles across Visio, SharePoint, Office 365 and Project for almost 10 years. Tatiana is a graduate of the Institute of Business Studies and holds a mini-MBA degree. She also graduated from Microsoft marketing excellence university.
How To Create A Calendar For A Group
Source: https://blog.virtosoftware.com/how-to-create-office-365-shared-calendar/
Posted by: eckmanonswity.blogspot.com
0 Response to "How To Create A Calendar For A Group"
Post a Comment