

How To Create A Media Player In Java Using Netbeans
Repository
https://github.com/dmlloyd/openjdk
What Will I Learn?
- You will learn how to create video player on NetBeans.
- You will learn how install and apply JMF (java media framework).
- You will learn how apply JMF plugin on NetBeans.
Requirements
- you must know the basic of java programming
- you must know how to create and resize video frame on netbeans
- you must have JMF, and NetBeans.
Difficulty
- Intermediate
Tutorial Contents
okay, on this occasion I will make an app to play video on NetBeans, one thing you should do before writing program is, download and install plugin for video or mp3 can be played, you can download it on this oracle official link : JMF Download, after you downloaded directly in install following the instructions from Oracle.
okay, just start our tutorial.
- first thing you have to do is create a new class on NetBeans.
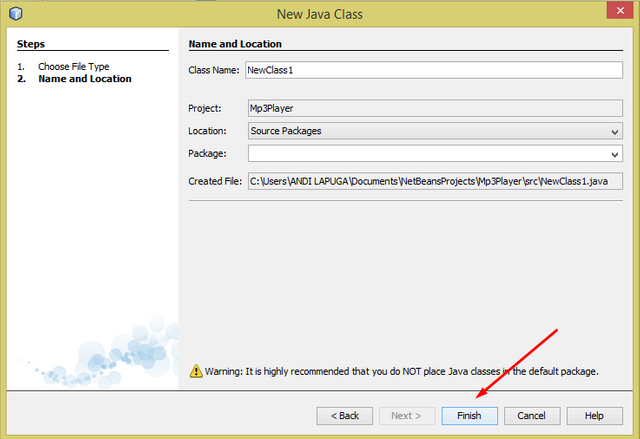
you can give any name to the new class you created.
- then write this at the beginning of the program, these are the packages we need to create a video player application.
import javax.swing.*; import java.awt.*; import java.awt.event.*; import javax.media.*; import java.net.*; - then type the program below until finished, then I will explain below.
public class NewClass extends JFrame { static Player mp4Player = null; public NewClass() { super("Demo JMF"); play(); Component panelControl = mp4Player.getControlPanelComponent(); Component visualComponent = mp4Player.getVisualComponent(); this.getContentPane().add(panelControl, BorderLayout.WEST); this.getContentPane().add(visualComponent, BorderLayout.CENTER); this.addWindowListener(new WindowAdapter() { public void windowClosing(WindowEvent we) { stop(); System.exit(0); }}); this.pack(); this.setSize(new Dimension(1080, 720)); this.setVisible(true);} public static void main(String[] args) { NewClass NewClass = new NewClass(); } void play() { try {URL url = new URL("file",null,"C:\\naruto.avi"); mp4Player = Manager.createRealizedPlayer(url); mp4Player.start(); } catch (Exception e) { System.out.println("unable to play :" + e); }} void stop() { mp4Player.stop(); mp4Player.close();}} - okay, I'll explain the important parts of the program above:
- this, is the declaration of the class name in the program.
public class NewClass extends JFrame { - this is the creation of a new object that we will call later in the next process
static Player mp4Player = null; - this we use because we play video using JMF plugin
super("Demo JMF"); - then we will call the method in JMF to play the video.
play(); Component panelControl = mp4Player.getControlPanelComponent(); Component visualComponent = mp4Player.getVisualComponent(); - and this is to determine the position of the video player window.
this.getContentPane().add(panelControl, BorderLayout.WEST); this.getContentPane().add(visualComponent, BorderLayout.CENTER); - This works to display the video player window.
this.addWindowListener(new WindowAdapter() { - and, this is the part that works to close the video window when we press the button close windows
public void windowClosing(WindowEvent we) { - this is a function exit that will end the process
stop(); System.exit(0); - this is for the process of determining the size of the video window, you are free to give any value.
this.pack(); this.setSize(new Dimension(1080, 720)); this.setVisible(true); - and this is the process of video calling and playback we will play, write down the location and name of the appropriate video on your computer partition.
void play() { try {URL url = new URL("file",null,"C:\\naruto.mpg"); mp4Player = Manager.createRealizedPlayer(url); mp4Player.start(); - this is for anticipation if there is a problem while the playing video.
catch (Exception e) { System.out.println("unable to play :" + e); - and the last is to end all processes.
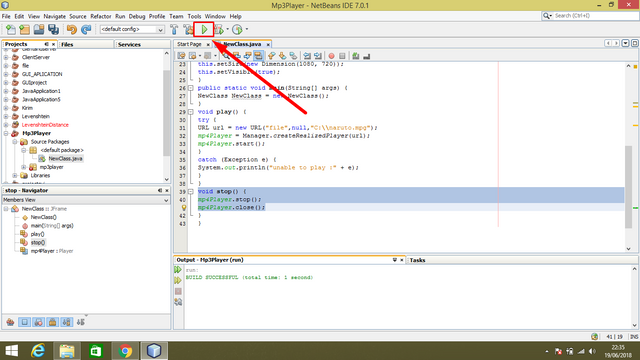
void stop() { mp4Player.stop(); mp4Player.close(); - okay after you finish typing all the programs, the next step is to run the program.
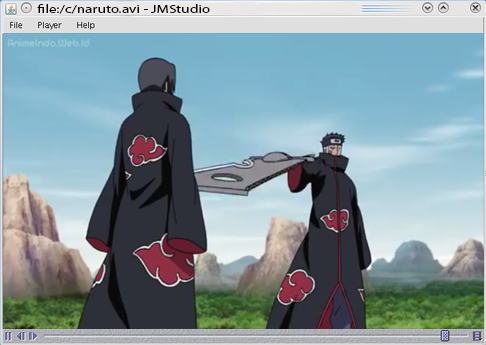
- if the program is successful it will show a video window and will play the video you choose, as shown below.
- If the video window does not appear, double check your program, there may be an error while typing the program or in the JMF plugin installation process.
- Okay, the tutorial is done, please try.
Curriculum
- Java Tutorial : How To Create java JFrame/GUI To Play Music On NetBeans
- Java Tutorial: How To Select And Send All File In One Folder Using "for" Looping Method On NetBeans
- HOW TO CREATE ACTION TO AUTO SELECT FILE USING "if" CONDITIONAL ON JAVA
- Java Tutorial: How To Create a Program To Send And Receive Files On NetBeans
Proof of Work Done
https://gist.github.com/andilapulga/41fa0c3cf932b0af87877baabd437471
How To Create A Media Player In Java Using Netbeans
Source: https://steemit.com/utopian-io/@lapulga/java-tutorial-how-to-create-jmf-mp4-player-video-player-on-netbeans
Posted by: eckmanonswity.blogspot.com
0 Response to "How To Create A Media Player In Java Using Netbeans"
Post a Comment