How To Draw 45 Degree Angle Line In Autocad
We have seen in earlier how to use polar tracking to draw inclined lines with specific angle sin AutoCAD, but what happens if you desire to input your own value instead of using the value prefixed by AutoCAD?
Before we dive into the subject matter, we need to revise some trigonometry.
The concept of polar coordinates in AutoCAD obeys the principle of the trigonometric circle, thus creating the need to revise that part of math for a minute.
Trigonometric circle
The trigonometric circle goes from 0 degrees to 360 degrees. One lap of the circle is 360 and 360 degrees is equivalent to zero degrees on the circle.
Here is what the circle looks like
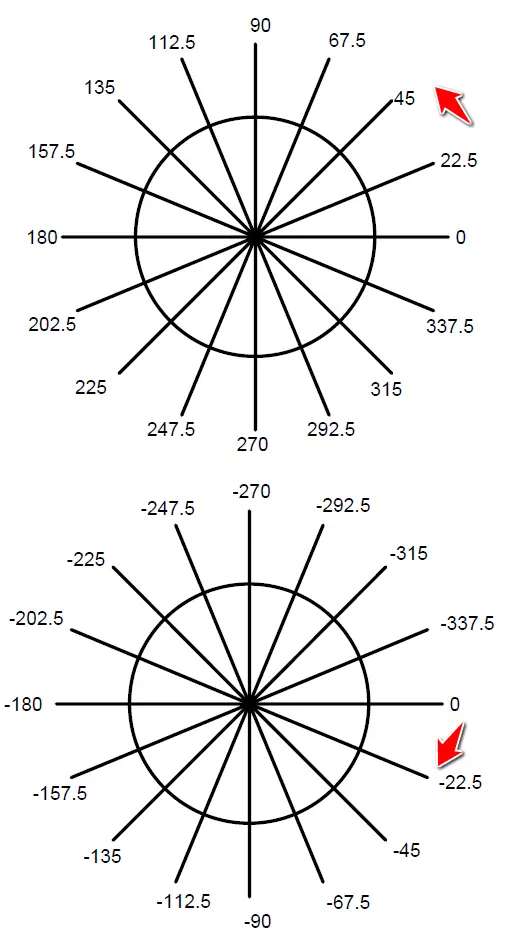
The mastery of the concept of angles is crucial to your ability to get things done in AutoCAD. You have to be capable of quickly deducing what the value of an angle is from the angle zero.
On the images above you will notice the trigonometric circle with angles counted respectively from the positive side (anticlockwise) and from the negative side (clockwise)
Notice -90 degrees = 270 degrees, 22.5 degrees = -337.5 degrees… and all other similarities
One of the most important information to have in mind is that AutoCAD always starts counting angles from zero. You will see why remembering this is important in a minute.
Angles and lines in AutoCAD
To draw a line in AutoCAD you can use the command line length<Angle.
Caution! EnableDynamic input before trying this
Example 1
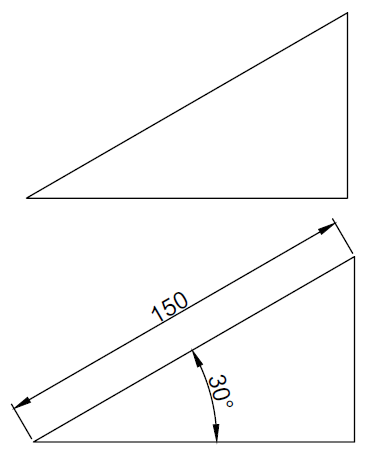
To draw the line of 150 units, you will have to (Here is how to change units in AutoCAD)
- Activate the LINE command
- Click in the drawing area to specify the starting point
- Type 150<30 and Hit ENTER
- Press ESC
where 150 is the length of the line and 30 is the angle the line makes with zero.
If I had written 150<-330 at step 2, it will give the same result.
Example 2
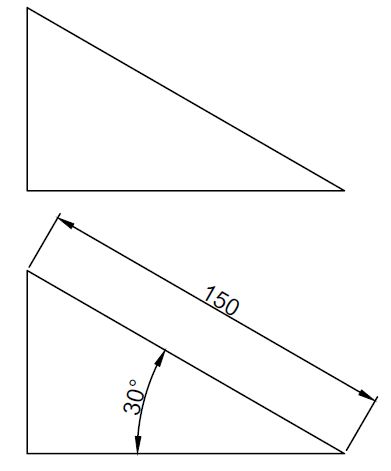
What if the figure were disposed of like this? How would you draw that 150 units line?
To draw the line of 150 units, you will have to
- Activate the LINE command
- Click in the drawing area to specify the start point
- Type 150<150 and Hit ENTER
- Press ESC
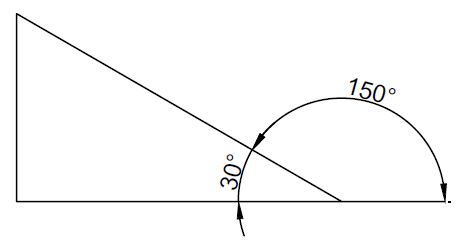
where the first 150 is the length and the second 150 is the angle. Why 150 for Angle? Because AutoCAD count angle from the angle zero, So to find the angle from zero, we needed to do 180-30=150.
Example 3
How about the following case
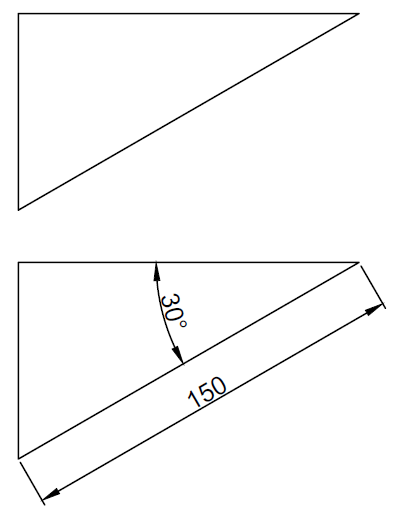
To draw the line of 150 units, you will have to
- Activate the LINE command
- Click in the drawing area to specify the start point
- Type 150<210 and Hit ENTER
- Press ESC
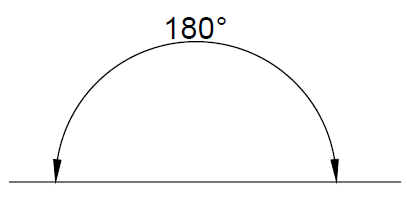
To find 220 we made 180+30.
Remember the flat angle is 180 degrees and we AutoCAD counts from zero.
Example 4
And this case
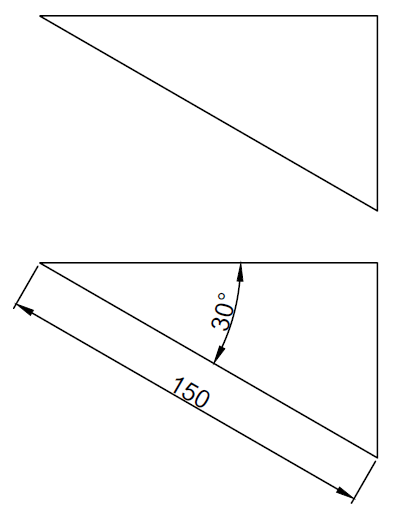
To draw the line of 150 units, you will have to
- Activate the LINE command
- Click in the drawing area to specify the start point
- Type 150<-30 and Hit ENTER
- Press ESC
Final words
You should now be able to know what information to give AutoCAD if you happen to deal with projects where angles do not have the zero angle as a reference.
These tutorials might be useful:
- Tutorial 01: Drawing your first object
- Tutorial 03: How To Draw Straight Line in AutoCAD
- Tutorial 06: Circles in AutoCAD
How To Draw 45 Degree Angle Line In Autocad
Source: https://tutorial45.com/angles-and-lines-in-autocad/
Posted by: eckmanonswity.blogspot.com

0 Response to "How To Draw 45 Degree Angle Line In Autocad"
Post a Comment